How to paint on black, stretchy fabric for costumes
I’ve decided to write up our journey creating the costumes for the Aerial Silks performances this year – during my research for the paints and fabrics, it isn’t quite as straight forward as you might assume. If you’re looking to create similar costumes for your event, read on!
To give you some background, before I go into the technicalities…
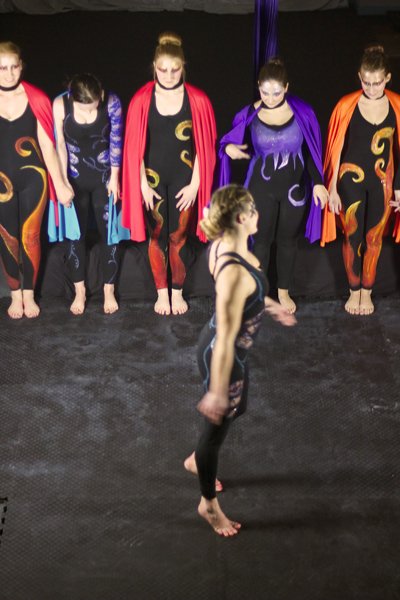
As a participant in Kelly Horne’s Aerial Silk performance this year, we decided to create custom costumes to stand out. A lot of the costumes found online just weren’t quite right, and so another student and I teamed up to create these costumes.
With the “Good” versus “Evil” theme in mind, and having just watched the Hunger Games, we went for a flame-inspired design for the “Evil” costume, and a galaxy/nature design for the “Good”. To connect the costumes, the Good design is an invertion of the Evil flames. The costumes we were using as a base were black, stretchy cotton-mix bodysuits.
So, now you know what we were doing, let’s get on to the fun stuff: painting! Originally, the plan was to use UV paint, however the lights we were using and the space we were in, along with the samples we tried (paintingsthatglow), just weren’t compatible and weren’t effective. After a lot of research, it seems that black fabric just doesn’t really work with UV paint, especially not “invisible” UV paint. Invisible UV paint just isn’t very effective on black fabric – certainly not for performing up to 10m away from the UV spot light. We did swatch the paint on white fabric, and I have to say, the invisible colours (that show only under UV light) purple, pink and blue were very disappointing and faint, even with several coats.
Abandoning the idea of UV paint, we moved on to the best fabric paint to source for stretchy, black fabric. We wanted vibrant colours. As the fabric was so stretchy, it became obvious quickly that we needed to paint the design directly onto the performer, whilst the costume was worn. Fabric that wasn’t pre-stretched while painted became “gappy” and cracked badly.
Because of this, we needed paint that didn’t require heat setting. Typically, fabric paints require ironing to set it into the material permanently. The best paints we found that fit this requirement, were the Deco SoSoft paints. They came in a wide range of colours – again, for us, a requirement.
When they arrived, although the coverage was adequate, the vibrancy was poor and the effect was disappointing. We didn’t have that “wow” factor we were looking for. During the pre-design stages, I had on a whim, used artist’s acrylic paint on spare fabric to see what would happen. It was bright. It was bold. It was beautiful!
We picked up 500ml pots very affordably at The Range, in the student-quality acrylic paints. Using artist’s quality brushes (Recommended! Those who pitched in using cheap brushes struggled to paint evenly and quickly as the bristles were so poor) we applied the paint to 11 costumes, taking approximately 20 hours in total from design, to test costume, to patiently coating each performer. And that’s how we did it! With regular acrylic paints. To add some sparkle, we used clear glitter nail polishes on top, which helped reduce cracking in areas.
As you’d expect, after 3 intense shows, the costumes did get wear and tear. Due to the amount of stretch, the paint did begin to crack. We did also notice that some paint transferred to the silks after some dramatic drops – I guess the heat generated by the friction is very hard to avoid.
I hope this helps you on your journey – black fabric isn’t the easiest to work with!